
To simplify the connection setup process, we can download the official GetEduroam application from the official GetEduroam page or from the GitHub page.
Download and connect
Windows
Step 1: Download the GetEduroam application from the official GetEduroam page (Fig. 1).
Step 2: Run the executable and press the „Connect to eduroam” button (Fig. 2).
Step 3: From the list of institutions, we will select the institution that we belong to. Click on the „Next" button (Fig. 3) to move to the next windows and again press the „Next" button to reach the connection field (Fig. 4).
Step 4: Enter the login data of the institutional account and click on the „Connect” button (Fig. 5). If the data was entered correctly we will notice that the application will display the message „You are now connected to eduroam” (Fig. 6).
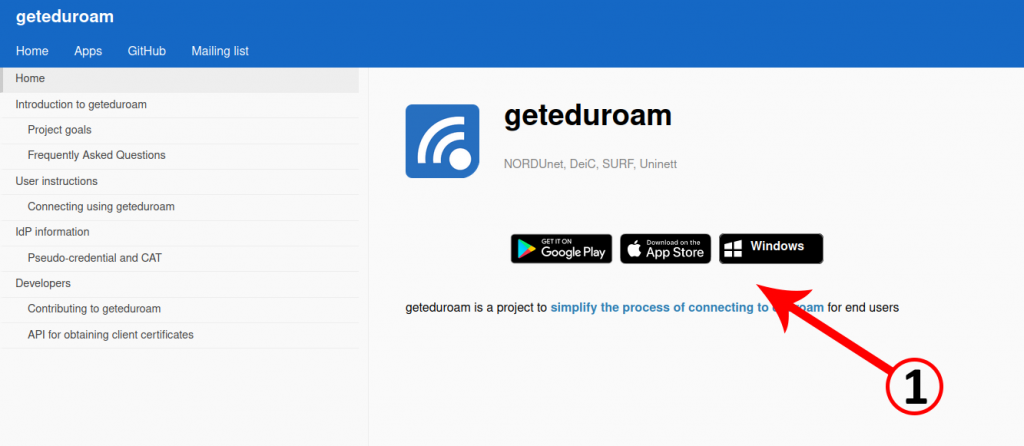
Fig. 1 Descărcare aplicație 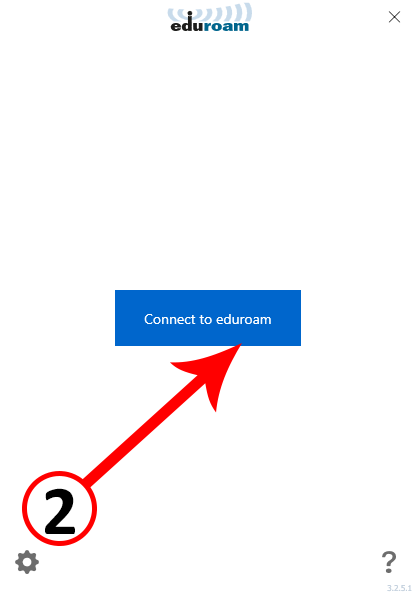
Fig. 2 Connect to eduroam 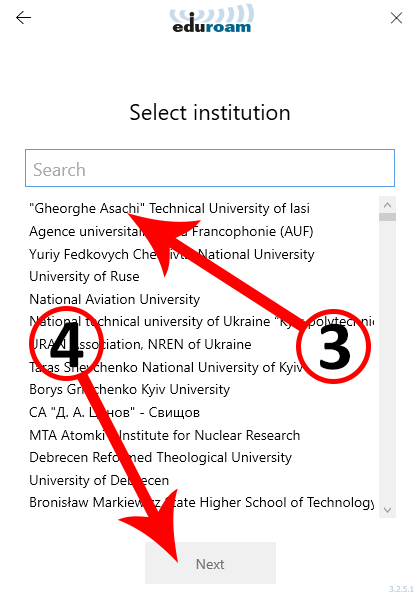
Fig. 3 Gheorghe Asachi 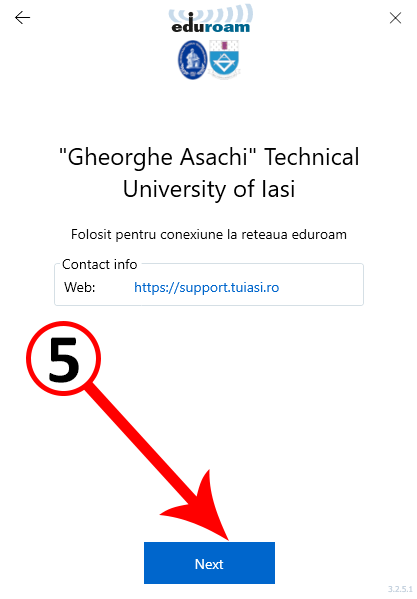
Fig. 5 Gheorghe Asachi Contact Info 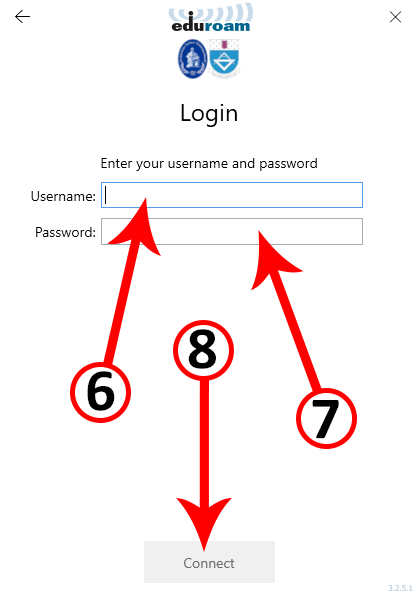
Fig. 6 Autentificare
Android
Step 1: Open the „Play Store” and search for the „geteduroam„ application. Click on the „Install” button to start the installation (Fig. 7).
Step 2: Open the GetEduroam application and select the institution we belong to from the list of institutions. Click on the „Next” button to proceed to the next step (Fig. 8).
Step 3: Enter the login data of the institutional account and click on the „Connect” button (Fig. 9). If the data was entered correctly we will notice that the application will display the message „Wi-fi is now configured on your device” (Fig. 10).
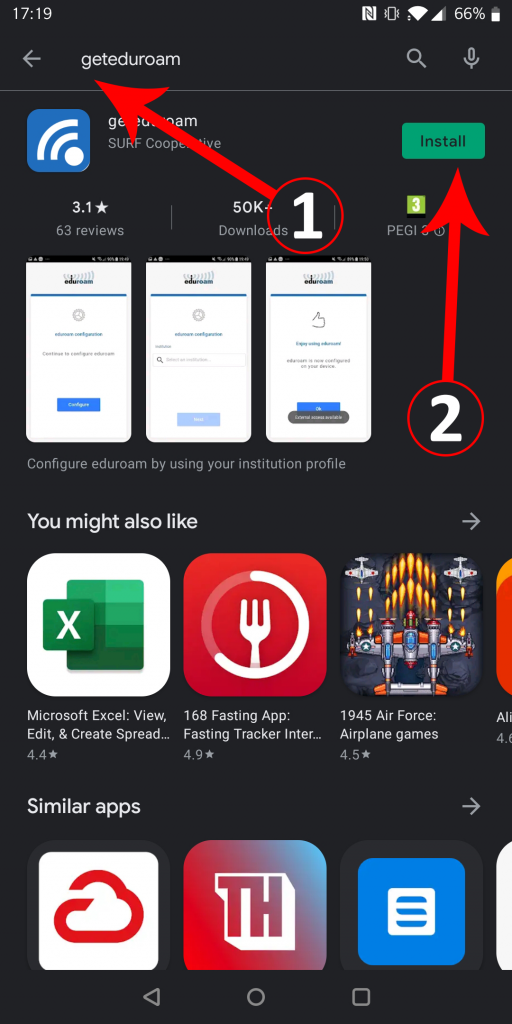
Fig. 7 Instalare aplicație 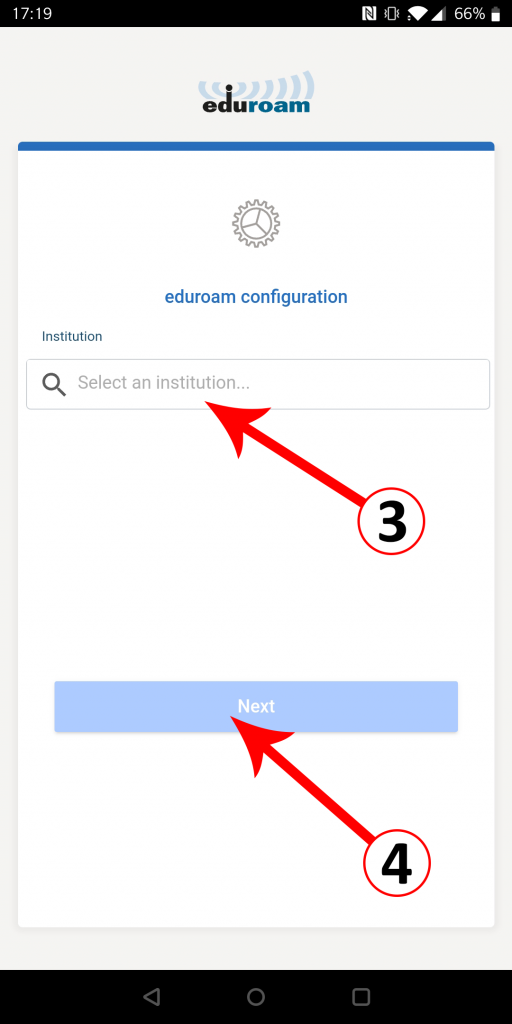
Fig. 8 Selectare instituție 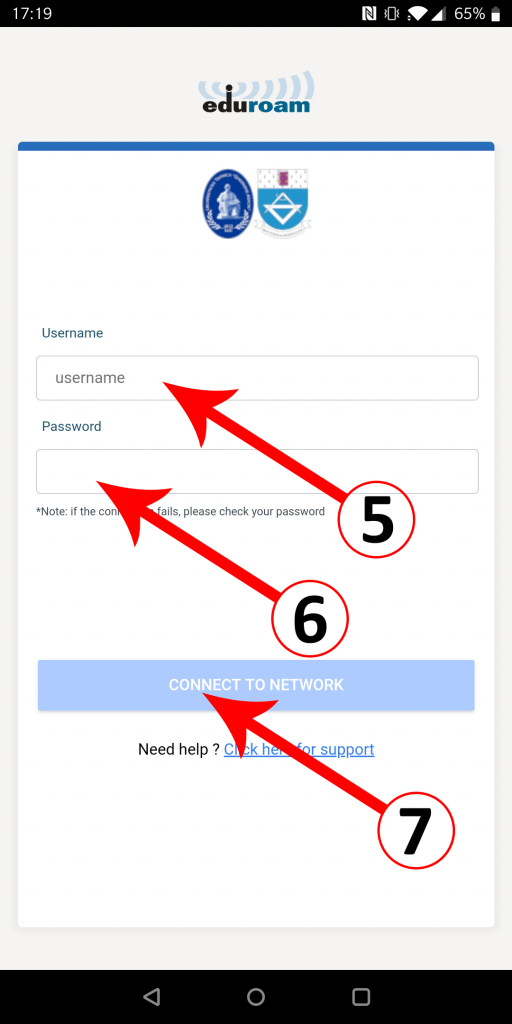
Fig. 9 Autentificare 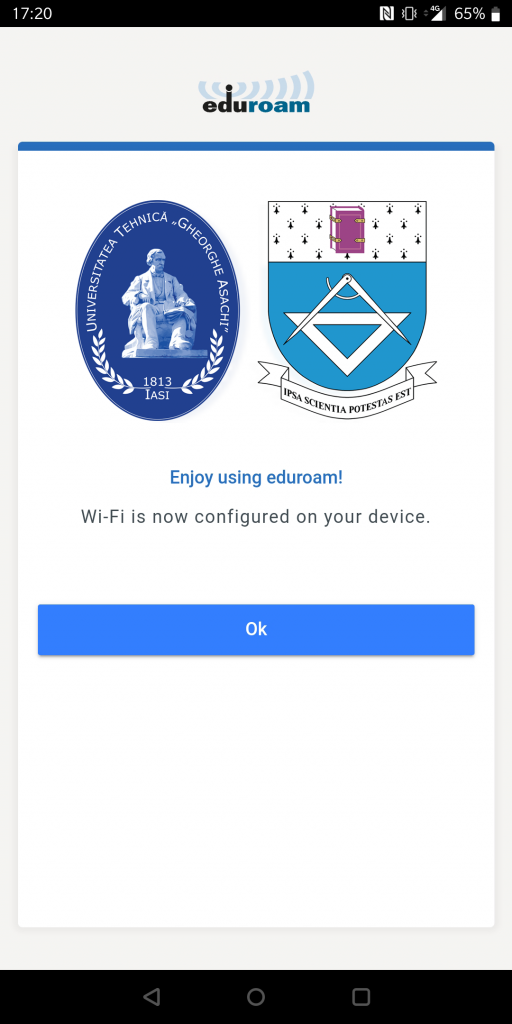
Fig. 10 Conectare realizata cu succes
iOS
Step 1: Run the „App Store” application and search for the „geteduroam„ application. Click on the „Install” button to start the installation (Fig. 11).
Step 2: Open the GetEduroam application and select the institution we belong to from the list of institutions. Click on the „Next” pbutton to proceed to the next step (Fig. 12).
Step 3: Enter the login data of the institutional account and click on the „Connect” button (Fig. 13). If the data was entered correctly we will notice that the application will display the message „Wi-fi is now configured on your device” (Fig. 14).